Welcome to the assembly manual for the Original V1 Desktop Robotic Arm.
Important: Please ensure you are using the correct manual. This is the assembly manual for the Original V1 Desktop Robotic Arm. Check the QR code on the inside of your Assembly Kit.
-- 2. Included Tools
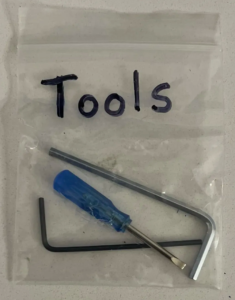
Tools are included to help with the assembly process.
⬢The tool package can be found in the box. The tool package includes: ⬢
M2.5 Allen Key (1x)
⬢
M1.5 Allen Key (1x)
⬢
2mm Mini Flathead Screwdriver (1x)
-- 3. Additional Tools Needed
⬢Some steps in the manual will require commonly available items to help you with assembly (not included in the kit): ⬢
Phillips Screwdriver - for attaching the pinion screws.
⬢
Electrical Tape - helps keep wiring connections strong.
⬢
Scissors - for cutting electrical tape and ESD bags.
⬢
Wire Cutters - useful for cutting wires & quick adjustments.
⬢
Soldering Iron - heating tool for heat inserts and soldering.
⬢
Solder Flux - to improve solder flow.
⬢
Solder (Thin) - solder for the PCBs!
⬢
Bar Clamps (2x) - for mounting the arm.
⬢
Computer - for programming the Arduino.
⬢
Hot Glue Gun - for attaching the electronics.
⬢
Hot Glue - for use in the hot glue gun.
-- 4. Navigating this Guide
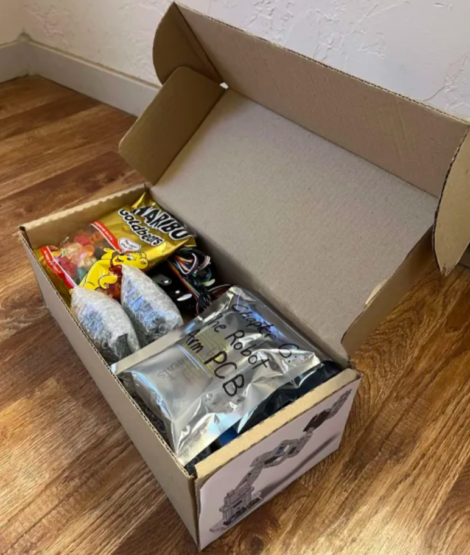
In the box, you'll find many wrapped parts and bags. Please follow the steps at each chapter during assembly to find parts.
There are many different types of instructions available in this guide. Scroll down through the guide to navigate. When you see menus like this, make sure you navigate through each panel as shown.
Step by Step Menu:
This is a step-by-step menu!
On these menus, please click on the next step before scrolling down. You'll see a note in orange every time there is another step to click to. Don't forget to click through each step before moving forward!
Try it by clicking the button above to go to Step 2.
╰┈➤ Go to Step 2: The Next Step
You Did It!
You completed Step 2...You can scroll down now!
You may also see this type of menu!
Step Down Menu:
These menus are usually used for software installs or step by step downloads. Click on Step 2 when you complete Step 1!
You made it! Feel free to scroll down.
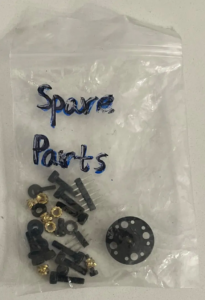
-- 5. Spare Parts Bag
In every kit, there is a spare parts bag with extra parts like header pins, heat inserts, etc. If something goes missing and you don't have a spare, please don't hesitate to contact us!
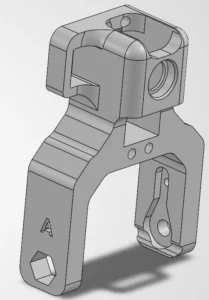
-- 6. Part Labeling
Many parts are labeled on the part itself! Note the image below of the Link A part. It is marked on the side with the letter A. When building, make sure the labels match the steps in this guide.
-- 7. We're here for you!
Lost in the instructions, missing screw or cracked part?
⬢Building the V1 Desktop Robotic Arm is enjoyable, but even more so with snacks. For every finished chapter, you deserve a treat! Look in the box and find a bag of Haribo Bears.
The biggest issue from our experience building arms is early bear overconsumption.
It is easy when seeing a bag of gummy bears to eat them all before getting started.
⬢ After years of thorough scientific engineering research, we came to a solution. ➜ At the end of each chapter, you will be told a specific amount of bears to consume.
⬢Eating an incorrect amount than prescribed in the manual might lead to a sudden boost of energy. Please consult a professional in the closest candy store.
Hide the Haribo for now! From our experience, an unattended bag with squishy bears will suddenly disappear. We are still investigating this phenomenon.
-- 9. How to Get A Build that Actually Works
To successfully finish the assembly kit, please follow all of these:
⬢Always read all the instructions at the current step first. It will help you to understand what you need to do. Don't cut or trim unless you are told to!!!
⬢ Don't follow pictures only! It is not enough, the written instructions are as brief as they could be. Read them!
⬢Use a reasonable force. The printed parts are tough, but not unbreakable. If it doesn't fit, check your approach twice.
⬢ Eat the gummy bears only when instructed! Disobedience won't be tolerated... 😀
⬢Most importantly: Enjoy the build, and have fun. Cooperate with your team, friends, or partners.
-- 10. Prepare Your Workspace
⬢ Tidy up your desk! Tidying up decreases the probability of losing small parts.
⬢ Clear your workspace. Make sure you have enough room. A nice clear flat workbench will get you the results you are aiming for.
⬢ Let there be light! Make sure you are in a well-lit environment. Another lamp or even an extra flashlight will probably come in handy.
⬢ Prepare something to contain the plastic bags and the removed packing materials so you can recycle them afterwards. Make sure there are no important parts being discarded.
⬢ Take a moment to take a big stretch.
⬢ Hmm... Did you really do it?
⬢ ...OK, we are ready. Let's start! On to Chapter 2: Base & Turret Assembly.
You're all set! On to Chapter 2: Base & Turret Assembly! ᯓ✈︎